howard miller grandfather clock instruction manual

Howard Miller Grandfather Clock Instruction Manual: A Comprehensive Guide
Unlock the timeless elegance of your Howard Miller grandfather clock! This manual details installation‚ operation‚ and maintenance for both battery and weight-driven models.
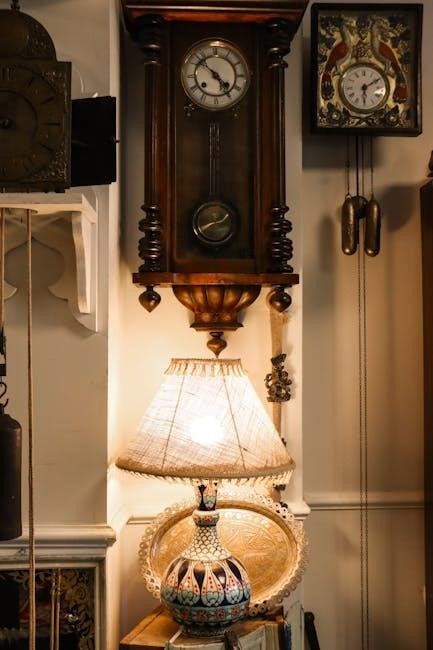
Understanding Your Howard Miller Grandfather Clock
Howard Miller grandfather clocks represent a legacy of quality and craftsmanship. These timepieces aren’t simply instruments for telling time; they are heirloom-quality furniture pieces designed to be cherished for generations. Understanding the core components and operational principles is crucial for proper care and longevity.
Whether your clock is weight-driven‚ relying on the controlled descent of weights to power the movement‚ or quartz-operated‚ utilizing battery power for precision‚ each model possesses unique characteristics. Familiarizing yourself with these differences will aid in setup‚ maintenance‚ and troubleshooting.
This guide will provide detailed insights into the intricacies of your clock‚ ensuring you can fully appreciate and maintain its beauty and accuracy for years to come. Proper understanding is the first step towards responsible ownership.
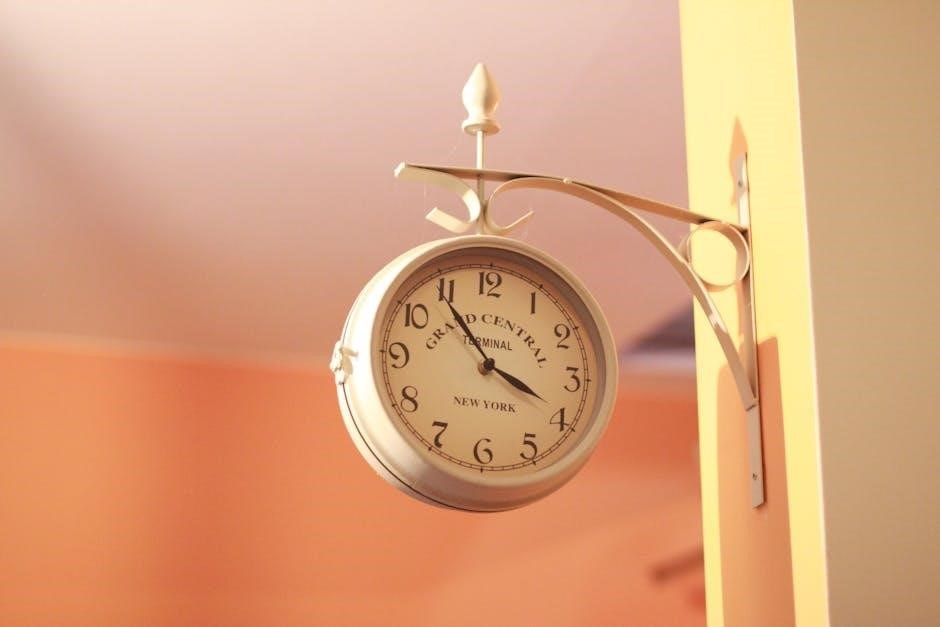
Clock Movement Types: Weight-Driven vs. Quartz
Howard Miller grandfather clocks utilize two primary movement types: weight-driven and quartz. Weight-driven clocks‚ a traditional design‚ employ weights suspended by cables to power the pendulum and timekeeping mechanisms. These require regular winding – typically weekly – as the weights descend. Their rhythmic ticking and chiming are powered solely by gravity.
Quartz movements‚ conversely‚ operate on battery power‚ offering exceptional accuracy and minimal maintenance. They eliminate the need for winding‚ providing consistent timekeeping. However‚ they lack the mechanical charm of weight-driven clocks.
Identifying your clock’s movement is vital for correct operation. Weight-driven clocks have visible weights and cables‚ while quartz clocks feature a battery compartment. Understanding this distinction dictates the appropriate setup and maintenance procedures.
Identifying Your Clock Model Number
Locating your Howard Miller grandfather clock’s model number is crucial for accessing specific instructions and replacement parts. The model number is typically found in several locations on the clock itself.
Check the following areas: Inside the clock’s door‚ on the back panel‚ or on a small metal plate affixed to the movement. It’s often a combination of letters and numbers (e.g.‚ 611-160). Sometimes‚ the number is subtly placed and requires a flashlight for visibility.
Having the model number readily available streamlines troubleshooting and ensures you obtain the correct documentation. It allows for precise searches on the Howard Miller website or when contacting customer support for assistance with your specific clock.

Locating the Original Instruction Manual (Online & Offline)
Finding your Howard Miller grandfather clock’s manual is often easier than you think! While the original paper copy may be misplaced‚ several resources are available.

Online: The Howard Miller website (www.howardmiller.com) has a comprehensive archive of manuals searchable by model number. Simply enter your clock’s number into their search bar. Offline: If online access isn’t available‚ consider contacting Howard Miller’s customer service directly; they may be able to mail a copy.
Alternatively‚ explore online clock forums and communities where users often share scanned copies of manuals. Having the manual ensures proper setup‚ operation‚ and long-term care of your cherished timepiece.
Setting Up Your Grandfather Clock
Proper setup is crucial for accurate timekeeping and the longevity of your Howard Miller grandfather clock. Begin by carefully unpacking all components‚ checking for any shipping damage. Choose a level‚ stable location away from direct sunlight and extreme temperature fluctuations.
Initial steps vary depending on your clock’s movement type. Weight-driven clocks require careful hanging of the weights (detailed later)‚ while quartz clocks need battery insertion. Ensure the clock is perfectly level before proceeding; use a level tool on the base and adjust the feet as needed. A stable foundation prevents pendulum interference and ensures consistent operation.
Initial Placement and Leveling
Selecting the right location is paramount. Place your grandfather clock on a solid‚ level floor capable of supporting its weight. Avoid areas prone to vibrations or excessive foot traffic. Leveling is absolutely critical for accurate timekeeping and chime function.
Use a spirit level placed on the clock’s base‚ both front-to-back and side-to-side. Most Howard Miller clocks feature adjustable leveling feet; rotate these feet until the bubble in the level is centered. Re-check frequently‚ especially after moving the clock. An unlevel clock can cause the pendulum to swing unevenly‚ impacting accuracy and potentially damaging the movement over time.
Hanging the Weights (Weight-Driven Clocks)
Proper weight placement is essential for operation. Identify the correct weight for each side – typically‚ the heavier weights go on the outside. Carefully lift each weight and hang it onto its designated hook‚ ensuring it’s securely seated. Never force the weights onto the hooks!
The weight cables should hang straight down without twisting. Observe the weight markings; incorrect placement can damage the clock’s mechanism. Allow the weights to descend fully before winding again. Avoid letting the weights run completely to the bottom‚ as this can strain the cables. Regularly inspect the cables for wear and tear.
Inserting Batteries (Quartz Clocks)
Powering your quartz grandfather clock is straightforward. Locate the battery compartment‚ usually at the back or side of the clock movement. Open the compartment and insert the correct type and size of batteries as specified in your clock’s model information – typically D-cell batteries.
Ensure correct polarity (+ and -) when inserting the batteries. Avoid mixing old and new batteries‚ or different battery types. Close the compartment securely. If the clock doesn’t start immediately‚ double-check the battery installation. Replace batteries annually‚ or when the clock begins to lose time or the chimes become weak.
Operating Your Grandfather Clock
Bringing your Howard Miller clock to life is a simple process. After setup‚ the initial step involves starting the pendulum – gently push it to initiate a steady swing. For weight-driven clocks‚ ensure the weights are fully hanging and not obstructed.
Setting the time is usually done with the hands directly; rotate them clockwise to the correct time. Adjusting the chime and hour count often involves levers or buttons located near the movement. Refer to your specific model’s instructions for precise details. Regular operation ensures consistent timekeeping and beautiful chime sequences‚ enhancing your home’s ambiance.
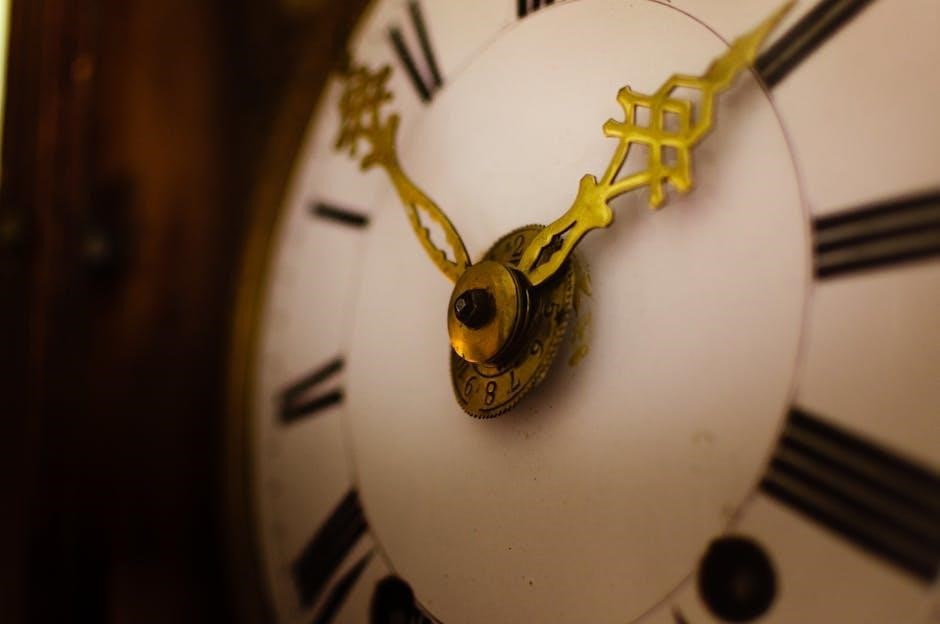
Starting the Pendulum
The pendulum is the heart of a mechanical Howard Miller grandfather clock. To initiate operation‚ gently displace the pendulum from its resting position – a slight push is all that’s needed. Avoid excessive force‚ as this could damage the delicate suspension spring.

Observe the pendulum’s swing; it should be a consistent‚ even arc. If the swing diminishes rapidly‚ the clock may not be level‚ or there could be an obstruction. Ensure nothing interferes with its movement. A properly swinging pendulum is crucial for accurate timekeeping and the charming tick-tock sound synonymous with grandfather clocks.
Setting the Time
To adjust the time on your Howard Miller grandfather clock‚ locate the hour and minute hands. Gently rotate them clockwise until the current time is displayed. Avoid turning the hands counter-clockwise‚ as this can strain the movement.
For precise setting‚ use a reliable time source. Observe the clock for a short period to confirm accuracy. Some models feature a separate chime setting mechanism; ensure this is synchronized with the time. Remember to account for Daylight Saving Time adjustments when applicable. Proper time setting ensures your clock remains a beautiful and accurate centerpiece.
Adjusting the Chime and Hour Count
Your Howard Miller grandfather clock’s chime and hour count are customizable! Locate the chime adjustment lever‚ typically at the back of the movement. Moving this lever controls whether the clock chimes the hour‚ half-hour‚ or is silenced.
To adjust the hour count‚ find the hour wheel – often marked with Roman numerals. Carefully rotate this wheel to select the desired number of chimes. Always ensure the chime and hour count settings are synchronized for accurate timekeeping. Refer to your specific model’s diagram for precise lever and wheel locations. Enjoy personalizing your clock’s melodic announcements!
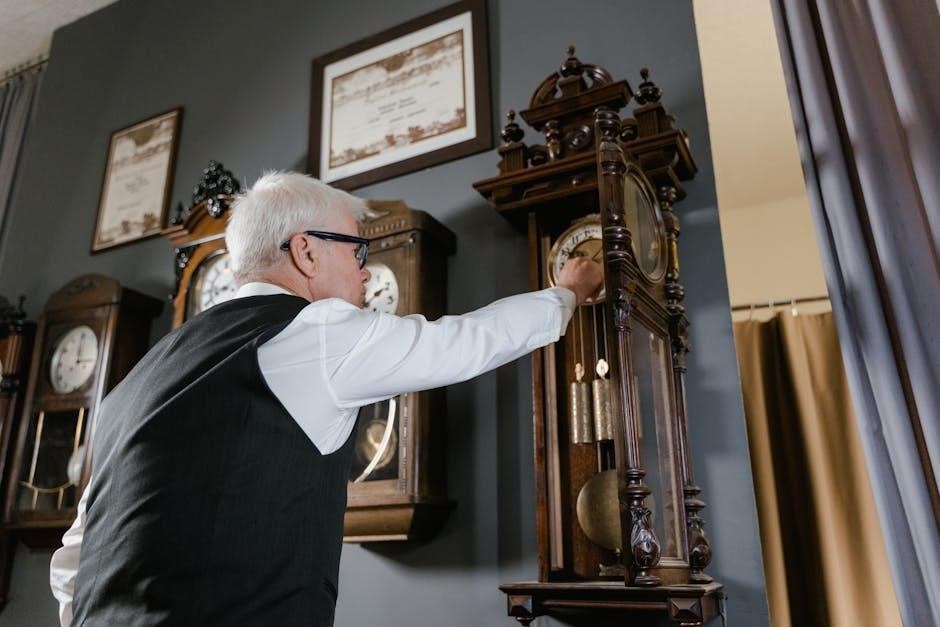
Maintaining Your Grandfather Clock

Preserving your Howard Miller grandfather clock’s beauty and accuracy requires regular maintenance. Dust the wood casing weekly with a soft‚ lint-free cloth. Avoid abrasive cleaners‚ which can damage the finish.
Periodically polish the wood with a high-quality furniture polish specifically designed for fine wood finishes. For weight-driven clocks‚ inspect the cables and weights for wear. Never attempt to disassemble the movement yourself! Professional cleaning and lubrication are recommended every five to seven years to ensure optimal performance and longevity. Consistent care will keep your clock ticking for generations.
Regular Cleaning and Polishing
Maintaining the aesthetic appeal of your Howard Miller grandfather clock is straightforward. Weekly dusting with a soft‚ dry‚ lint-free cloth prevents dust buildup‚ preserving the wood’s luster. For more thorough cleaning‚ dampen the cloth slightly with water – never spray directly onto the clock!
Polishing should be done sparingly‚ typically every few months‚ using a high-quality furniture polish formulated for fine wood. Apply a small amount to the cloth‚ not directly to the clock‚ and buff gently. Avoid polishes containing silicone or harsh chemicals. This routine ensures your clock remains a stunning centerpiece for years to come.
Lubrication (Weight-Driven Clocks) ⎯ When & How
Weight-driven Howard Miller grandfather clocks require periodic lubrication to ensure smooth operation. Typically‚ lubrication is needed every 3-5 years‚ though environmental factors can influence this. Never use oil on quartz movements!
Use a high-quality clock oil specifically designed for mechanical movements. Apply a small drop to the pivots of the gears and the pendulum suspension spring. Avoid over-oiling‚ as excess oil attracts dust. If unsure‚ consult a qualified clock repair specialist. Proper lubrication minimizes friction‚ extending the life of your clock’s intricate mechanism.
Pendulum Adjustment for Accuracy
Maintaining accurate timekeeping requires occasional pendulum adjustment. Most Howard Miller grandfather clocks feature a rating nut located at the bottom of the pendulum. Turning the nut clockwise slows the clock down‚ while turning it counter-clockwise speeds it up.
Make small adjustments – a quarter turn at a time – and observe the clock’s performance over several days. Patience is key! Environmental factors like temperature and humidity can affect accuracy. Regularly check your clock against a reliable time source and fine-tune as needed to ensure precise timekeeping for years to come.

Troubleshooting Common Issues
Encountering problems? Here’s a quick guide. If your clock stops running‚ first ensure weights are fully descended (weight-driven) or batteries are fresh (quartz). Incorrect chimes often indicate an improper time-of-day setting; re-set the time carefully. A pendulum that won’t swing may need a gentle push to initiate movement‚ or the clock might not be level.
Avoid forcing any mechanism. If issues persist‚ consult the full manual or a qualified clock repair specialist. Regular maintenance‚ as outlined in this guide‚ can prevent many common problems and prolong your clock’s life.
Clock Stops Running
A non-running clock is a common concern. For weight-driven models‚ verify the weights haven’t fully descended. Rewind them completely‚ ensuring a smooth‚ unobstructed path. For quartz clocks‚ replace the batteries with fresh ones‚ checking polarity. Confirm the pendulum is correctly positioned and has sufficient swing amplitude.
Check for obstructions. Ensure nothing interferes with the pendulum’s movement or the weight cables. If the problem continues‚ gently level the clock again. Avoid forceful adjustments. If these steps fail‚ professional servicing may be required to diagnose internal mechanical issues.
Chimes are Incorrect
Incorrect chiming often stems from improper time or chime setting adjustments. First‚ confirm the clock displays the correct time. Then‚ review the chime sequence settings – many Howard Miller clocks offer selectable chime patterns (Westminster‚ Whittington‚ etc.). Consult your specific model’s manual for instructions on accessing these settings.
Hour count adjustments are also crucial. Ensure the hour count mechanism accurately reflects the current hour. If the chimes still seem off‚ a slight adjustment to the chime hammer alignment might be necessary‚ but this is best left to a qualified clock repair technician to avoid damage.
Pendulum Won’t Swing
A non-swinging pendulum usually indicates an issue with the suspension spring or the level of the clock. Gently initiate the pendulum’s swing; if it stops quickly‚ check the suspension spring for kinks or damage. Ensure the clock is perfectly level – even a slight tilt can prevent proper pendulum motion.
Obstructions are another common cause. Verify nothing is interfering with the pendulum’s arc. If the problem persists‚ the escapement mechanism might require professional attention. Avoid forcing the pendulum‚ as this could cause further damage. A qualified technician can diagnose and repair any issues within the clock’s movement.
Finding Replacement Parts
Sourcing replacement parts for your Howard Miller grandfather clock is crucial for maintaining its longevity. The Howard Miller Official Website is the primary source for genuine components‚ offering a wide selection of parts searchable by clock model number.
Alternatively‚ several reputable third-party clock repair specialists stock Howard Miller parts. These specialists often provide assistance in identifying the correct part needed. When ordering‚ always have your clock’s model number handy to ensure compatibility. Be cautious of generic parts‚ as they may not meet Howard Miller’s quality standards and could affect performance.
Howard Miller Official Website
The Howard Miller Official Website (www.howardmiller.com) is an invaluable resource for owners. It provides access to a comprehensive archive of clock instruction manuals‚ searchable by model number. You can also find detailed information about clock care‚ maintenance tips‚ and frequently asked questions.
Furthermore‚ the website offers a direct channel for purchasing genuine replacement parts‚ ensuring compatibility and quality. Product Mastery Begins Here‚ as the site proclaims‚ offering resources to fully understand your clock. Registration options may be available for enhanced support and access to exclusive content. Explore the site for a wealth of information!
Third-Party Clock Repair Specialists
When professional assistance is needed beyond self-maintenance‚ qualified clock repair specialists are available. Searching online for “grandfather clock repair near me” will yield local options. Ensure the specialist has experience specifically with Howard Miller clocks‚ as their movements can be intricate.
Look for certifications from organizations like the National Association of Watch and Clock Collectors (NAWCC). Request quotes from multiple specialists‚ detailing the issue and potential repair costs. Verify their reputation through online reviews and references. Proper repair ensures the longevity and accurate timekeeping of your cherished grandfather clock.